Learning how to do vinyasa flow properly transforms more than just your flexibility—it rewires how your body moves, breathes, and recovers, especially if you’re training in martial arts or combat sports. Vinyasa flow, with its seamless connection between breath and movement, builds the kind of functional mobility and mental clarity that fighters, grapplers, and athletes desperately need but rarely prioritize. The problem is that most people either rush through the basics, forcing their bodies into shapes they’re not ready for, or they practice in isolation from their actual training, missing the chance to integrate flow work into their performance and injury prevention strategy.
At Trein Club in Houston, we’ve built vinyasa flow into the core of how we train because Pedro Araujo, our founder and 4x Jiu-Jitsu World Champion, is also a 500+ hour certified yoga trainer. He understands that proper vinyasa flow isn’t just stretching—it’s a practice that enhances your athleticism, calms your nervous system, and keeps your body balanced against the demands of grappling and striking. Whether you’re a beginner looking to move better or an experienced athlete seeking to deepen your practice, mastering the fundamentals of vinyasa flow will elevate every other training you do.
What Is Vinyasa Flow? (And Why Proper Form Matters)
Vinyasa flow is a dynamic style of yoga in which every movement is tied to a specific breath, producing a continuous, choreographed sequence rather than a string of isolated postures. The Sanskrit word vinyasa loosely translates as “to place in a special way,” and that phrase already hints at why proper form isn’t negotiable: what matters isn’t how quickly you move or how deep you sink, but the precision of alignment, breath, and intention behind each transition. Done well, this practice builds strength, mobility, cardiovascular endurance, and mental focus all at once. Done poorly, it accelerates shoulder injuries, chronic wrist pain, and lower-back compression — which is exactly why understanding the mechanics matters far more than keeping up with the person on the next mat.
At Trein Club in Houston, our yoga program is led by Pedro Araujo, a 4x Jiu-Jitsu World Champion and 500+ hour certified yoga trainer. That background shapes how we teach the practice: the same eye for detail that produces world-class grapplers also informs how we cue a chaturanga or a downward dog. If the style is new to you, our overview of what vinyasa flow is and the deeper meaning behind what vinyasa flow means are useful primers before you step onto the mat.
The Difference Between Vinyasa, Hatha, and Other Yoga Styles
Hatha yoga tends to be slower and more static — you hold poses for several breaths, refining alignment without transitioning quickly. Vinyasa, by contrast, is continuous: movement happens on almost every inhale and exhale. Ashtanga follows a fixed, unchanging series, while vinyasa is more creative and shifts from class to class. Power yoga is essentially a heated, more athletic branch of the same lineage. These distinctions matter because pacing and intensity dictate technique: in vinyasa, you can’t muscle through — the breath has to lead.
Why Most Beginners Do Vinyasa Incorrectly — and How to Fix It
The most common beginner mistake isn’t flexibility-related — it’s a mindset issue. Newcomers try to match the teacher’s pace or their neighbor’s shape instead of honoring their own breath rhythm. That habit leads to shallow breathing, collapsed shoulders in chaturanga, and rushed transitions that skip the alignment cues entirely. The remedy is simple in principle and hard in practice: slow down. If you can’t sustain smooth, four-count inhales and exhales, you’re moving too fast for your current level. Cut the sequence in half, use modifications, and let quality dictate quantity.
The Core Sequence: Step-by-Step Vinyasa Flow Breakdown
The signature transition — often called a “vinyasa” itself — chains four poses: plank, chaturanga dandasana, upward-facing dog (or cobra), and downward-facing dog. This sequence appears dozens of times in a single class, so getting the mechanics right pays enormous compound interest across your practice.
Step 1 — Plank Pose: Alignment, Wrist Position, and Core Engagement
Begin with wrists directly beneath the shoulders, fingers spread wide, and the middle finger pointing forward. Press through the knuckles — especially the index-finger knuckle — to shift weight off the wrist joint. Extend one leg back at a time, tuck the toes, and lift into a straight line from crown to heels. Engage the quads, tuck the tailbone slightly, and draw the navel toward the spine. If the hips sag or the shoulders round forward, drop to your knees; there’s no shame in a modified plank, only wisdom.
Step 2 — Chaturanga Dandasana: The Most Misunderstood Transition
From plank, shift your weight forward onto your toes until the shoulders pass over your fingertips. Only then do the elbows bend — straight back, hugging the ribs, never flaring outward. Lower until the upper arms are parallel to the floor (elbows at roughly 90 degrees), no lower. Shoulders stay in line with the elbows and should never dip below them. If holding that shape with control isn’t yet possible, lower the knees first, then bend the elbows. This pose is where most shoulder injuries in yoga originate, and the culprit is almost always ego overriding form.
Step 3 — Upward-Facing Dog vs. Cobra: Which One Is Right for You
Upward-facing dog (urdhva mukha svanasana) asks you to press through straight arms with thighs lifted off the mat — only the tops of the feet and the palms touch the ground. It demands considerable shoulder, wrist, and back strength. Cobra (bhujangasana) is the beginner-friendly counterpart: thighs and pelvis remain on the mat, elbows stay bent, and the lift comes primarily from the back muscles. If you’re new, or if you feel any pinching in the lower back during up dog, use cobra. That isn’t a downgrade — cobra strengthens the exact muscles you’ll need to graduate safely into up dog.
Step 4 — Downward-Facing Dog: How to Reset and Breathe
From up dog or cobra, tuck the toes and lift the hips high and back, forming an inverted V. Hands remain shoulder-width, feet hip-width, and the priority is a long spine — not flat heels. If your hamstrings are tight, bend the knees generously. Externally rotate the upper arms, broaden across the collarbones, and let the head hang heavy. Down dog is a “rest” pose within the sequence, so take three to five full breaths here whenever you need to recalibrate.
Breath Synchronization: The True Meaning of Vinyasa
Without breath, vinyasa collapses into aerobics. The breath is the metronome; the postures are simply what the body does between inhales and exhales.
Inhale vs. Exhale: Which Movement Gets Which Breath
The general rule: inhale on expansions and lifts, exhale on contractions and folds. You inhale to lift into upward dog because the chest opens; you exhale into chaturanga because you’re compressing. You inhale to reach the arms overhead in mountain pose; you exhale to forward-fold. Once that pattern becomes second nature, the entire practice turns into an intuitive rhythm rather than a checklist.
How to Use Ujjayi Breathing to Anchor Your Flow
Ujjayi — sometimes called “ocean breath” or “victorious breath” — is a slight constriction at the back of the throat that produces an audible, whispering sound on both inhale and exhale. Both happen through the nose. Ujjayi does two things: it slows your breathing to a sustainable pace, and it gives you an auditory signal to track. If you can no longer hear your own ujjayi, you’re either holding your breath or moving too fast. That same breath control is one of the reasons yoga is so effective for athletes, including the jiu-jitsu practitioners at our gym who rely on breath discipline during rolls.
Signs Your Breath and Movement Are Out of Sync — and How to Realign
Warning signs include gasping, holding your breath during chaturanga, feeling lightheaded, or noticing that inhales and exhales have become wildly uneven in length. The fix: pause in downward dog, take five full ujjayi breaths without moving, then rejoin the sequence at half speed. Your practice is not a race against the teacher’s count.
10 Key Elements of Proper Vinyasa Flow Technique
1. Bandhas (Energy Locks): Mula and Uddiyana for Stability
Mula bandha is a gentle lift of the pelvic floor, similar to a Kegel. Uddiyana bandha is a subtle drawing-in of the lower belly. Together, they create a stable, engaged core throughout the practice, protecting the lumbar spine and giving your transitions power.
2. Drishti (Gaze Points): Where to Look During Each Pose
Every posture has a traditional gaze point: nose tip in chaturanga, third eye in up dog, navel in down dog. A fixed drishti reduces distraction, steadies balance, and turns the practice inward.
3. Shoulder Blades: Protraction, Retraction, and Avoiding Collapse
In plank and chaturanga, actively push the floor away — that protraction prevents the shoulder blades from collapsing together and pinching the joint. In up dog, retract slightly to open the chest without crunching the neck.
4. Hip Alignment: Keeping Hips Square Through Transitions
Stepping forward into a lunge or warrior pose, the tendency is for the back hip to swing open. Actively rotate it forward to keep the pelvis square, protecting the sacrum and building genuine hip mobility.
5. Foot Placement and Weight Distribution in Every Pose
In standing poses, distribute weight evenly across the four corners of each foot: big-toe mound, pinky-toe mound, inner heel, outer heel. In lunges, the front knee stacks over the ankle — never past the toes.
6. Neck Neutrality: Protecting Your Cervical Spine
In plank, chaturanga, and down dog, the neck should extend naturally from the spine. Don’t crane the head up to look forward or let it collapse down. The gaze may shift, but the cervical spine stays long.
7. Pacing: How Slow or Fast Should a Vinyasa Flow Be
Generally, one movement per breath, with each breath lasting four to six seconds. Any faster and form deteriorates; slower can be a valuable variation but is no longer flow in the classical sense.
8. Modifications and Props: When and How to Use Blocks and Straps
Blocks bring the floor closer when your flexibility isn’t there yet; straps extend your reach. Using props is a mark of intelligent practice, not weakness — they let you access correct alignment now instead of forcing a shape your body isn’t ready for.
9. Transitional Awareness: Moving Mindfully Between Poses
The passages between poses matter as much as the poses themselves. Rushing them is where injuries hide. Move as if every position between two shapes is itself a pose worth doing well.
10. Rest Poses: Using Child’s Pose to Maintain Quality Over Quantity
Child’s pose is always available. Dropping into it mid-flow isn’t quitting — it’s protecting the quality of the rest of your practice. Rejoin the class when your breath returns to steady ujjayi.
Common Vinyasa Mistakes and How to Correct Them
Sinking Hips in Chaturanga (and the Shoulder Injury Risk)
When the hips drop below the shoulders, the entire load shifts into the shoulder joint at an unsupported angle. Correct it by lowering the knees, engaging the core aggressively, and thinking “long, low, straight line” instead of “get to the floor.”
Holding Your Breath Without Realizing It
Concentration on new movements often triggers unconscious breath-holding, especially during chaturanga. Cue yourself: if you can’t hear your ujjayi, you’re not breathing. Exhale audibly on the way down.
Rushing Through Transitions to Keep Up With the Class
Class pace is a suggestion, not a mandate. Take an extra breath in down dog while the room moves on — you’ll catch up naturally at the next pose.
Locking the Elbows in Upward Dog
Hyperextended elbows put load on the joint capsule instead of the muscles. Keep a micro-bend and engage the biceps and triceps to support the weight actively.
Beginner-Friendly Vinyasa Flow: A Safe Starting Sequence
How to Build Up to a Full Vinyasa if You’re New to Yoga
Start with 10–15 minute sessions two or three times a week. Focus on cat-cow, plank holds, cobra, and downward dog in isolation before chaining them. Build strength and body awareness first; speed comes later. Most students are ready for a full 60-minute class within three to four weeks of consistent short practice.
Modified Vinyasa Options for Wrist Pain, Tight Hamstrings, or Low Fitness
For wrist pain, practice on the fists or place wedges under the heel of the hand. For tight hamstrings, keep the knees generously bent in down dog and forward folds. For lower fitness levels, take chaturanga on the knees and rest in child’s pose between every sequence. None of these compromise the practice — they preserve it.
Sample 10-Minute Beginner Vinyasa Flow (Pose-by-Pose)
- Child’s pose — 5 breaths
- Cat-cow — 5 rounds
- Downward-facing dog — 5 breaths
- Plank — 3 breaths
- Knee-supported chaturanga — 1 breath
- Cobra — 3 breaths
- Downward-facing dog — 5 breaths
- Low lunge (right leg) — 5 breaths
- Low lunge (left leg) — 5 breaths
- Forward fold — 5 breaths
- Mountain pose — 5 breaths
- Savasana — 2 minutes
How to Structure a Full Vinyasa Flow Practice
Warm-Up: Sun Salutations A and B as a Foundation
Sun Salutation A introduces the vinyasa transition in its simplest form; Sun Salutation B adds warrior poses and chair pose. Three to five rounds of each build heat and rehearse the movements you’ll expand on later. Sun salutations aren’t the same as a vinyasa — the vinyasa is the specific plank-to-down-dog transition inside a salutation.
Peak Pose Planning: Building Toward One Challenging Posture
A well-designed practice has a “peak” — a challenging posture such as crow, headstand, or bird of paradise — that the earlier sequences prepare the body for. Everything before the peak opens the necessary muscles; everything after cools the system down.
Cool-Down and Savasana: Why You Should Never Skip It
Savasana (corpse pose) is not optional. It’s where the nervous system integrates the practice, cortisol drops, and physical benefits consolidate. Five to ten minutes lying still is when the class actually “happens” biochemically. Skipping it is like ending a workout by sprinting to your car.
How Often Should You Practice Vinyasa Flow?
Frequency Recommendations for Beginners, Intermediate, and Advanced Practitioners
Beginners benefit from two to three sessions per week, ideally 45–60 minutes each. Intermediate practitioners can safely add a fourth or fifth session. Advanced students often practice five to six times weekly, but even they should include gentler days — restorative or yin — to let the tissues recover. Daily vinyasa without variation invites overuse injuries in the shoulders and wrists.
How to Combine Vinyasa With Strength Training or Other Workouts
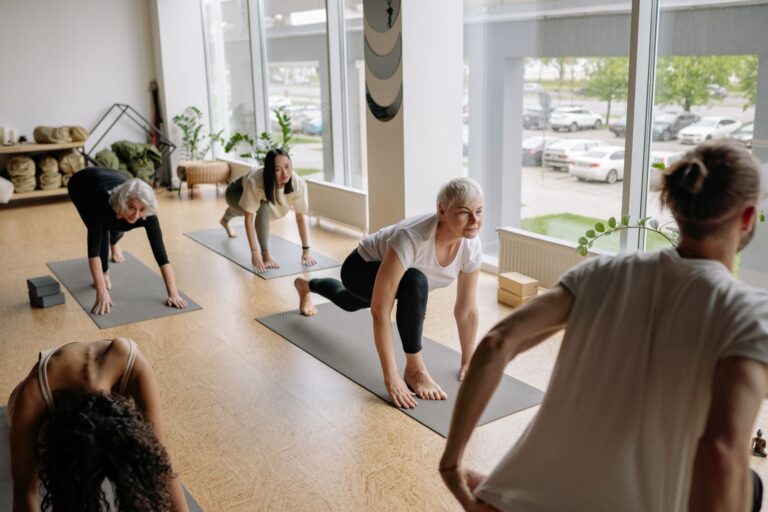
This style pairs exceptionally well with strength training, running, and combat sports. At Trein Club, many of our jiu-jitsu members use yoga two or three times weekly to maintain mobility, prevent injury, and sharpen the breath control that makes such a difference under pressure — the same reason yoga for athletes has become foundational at every level of sport. If you’re curious about the energy-expenditure side, we break down how many calories vinyasa flow burns in a separate guide. Space vinyasa away from heavy pushing days (bench, overhead press) by at least 24 hours so the shoulders aren’t asked to do chaturanga on a fatigued joint.
Frequently Asked Questions
What is the correct order of poses in a vinyasa?
The classical transition is: plank → chaturanga dandasana → upward-facing dog (or cobra) → downward-facing dog. This four-pose chain repeats throughout a class and serves as the “reset” between larger sequences.
How do you breathe properly during vinyasa flow?
Use ujjayi breath — slow, audible inhales and exhales through the nose with a slight throat constriction. Inhale on expansions and lifts, exhale on contractions and folds. Each breath should last roughly four to six seconds, and you should always be able to hear yourself breathing.
Is vinyasa flow suitable for complete beginners?
Yes, with the right class. Look for sessions labeled “beginner,” “slow flow,” or “vinyasa fundamentals.” Avoid heated power vinyasa until you’ve built a base of alignment knowledge. Modifications and props make the practice accessible to virtually every body and fitness level.
What is the difference between a vinyasa and a sun salutation?
A sun salutation is a full sequence starting and ending in mountain pose. A “vinyasa” — as a specific term inside a class — refers only to the plank-to-chaturanga-to-up-dog-to-down-dog transition, which appears within a sun salutation and between other sequences.
How do I protect my wrists during vinyasa?
Spread the fingers wide, press firmly through the knuckles (especially the index-finger knuckle), and shift weight forward off the heel of the hand. Warm the wrists up with circles and gentle stretches before class. If pain persists, use wedges, fists, or forearm modifications.
Why does my lower back hurt after vinyasa flow?
Usually because you’re collapsing into the lumbar spine in up dog or cobra instead of lifting through the chest with engaged legs and glutes. Weak core engagement is another frequent culprit. Focus on activating mula and uddiyana bandhas, tucking the tailbone slightly, and lifting the pubic bone toward the navel in backbends.
How long should a vinyasa flow practice be?
For beginners, 20–30 minutes is plenty. Standard studio classes run 60–75 minutes. Advanced practitioners may go 90 minutes or more. Quality always beats duration — a focused 20-minute session with sharp form outperforms an hour of sloppy movement every time. At Trein Club in Houston’s Oak Forest neighborhood, our yoga classes are designed to meet you where you are, with Pedro Araujo personally guiding students through breath, alignment, and the deeper intention behind every movement.