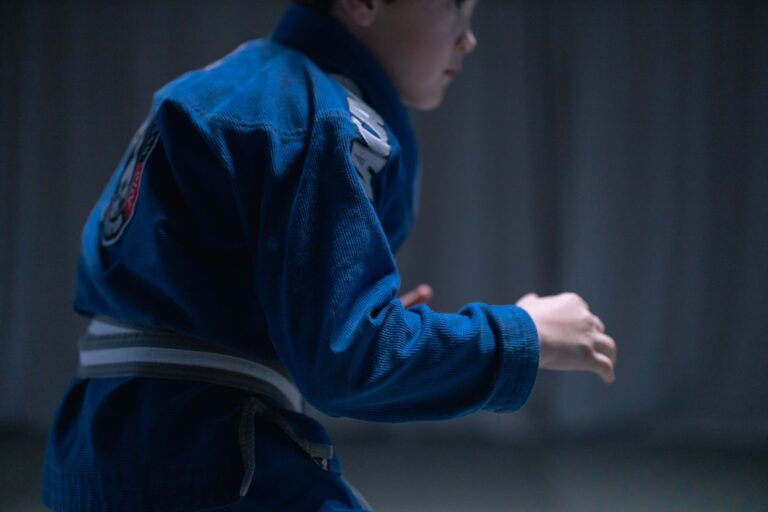
Learning how to tie a jiu-jitsu belt for kids is one of the first lessons your child will master on the mat—and it’s more meaningful than it might seem. That colored belt represents growth, discipline, and the beginning of a journey in Brazilian jiu-jitsu, so getting it right sets the tone for respect and attention to detail that carries into every class. Whether your child just earned their first belt or you’re preparing them for their first day of training, understanding the proper technique ensures they’re ready to focus on learning rather than fumbling with their gi.
At Trein Club in Houston, we see firsthand how kids light up when they master this simple skill—it’s often their first real accomplishment in jiu-jitsu. The belt-tying ritual becomes part of the discipline and intentionality that makes martial arts so transformative for young practitioners, building confidence and focus both on and off the mat. In this guide, we’ll walk you through the steps so your child can tie their belt with confidence, just like our champions teach every day.
How to Tie a Jiu-Jitsu Belt for Kids: Step-by-Step Guide
Tying a jiu-jitsu belt on a child seems straightforward until you’re kneeling on the mat two minutes before class, wrestling with a wiggly kid and a belt that refuses to stay flat. The good news: there’s a reliable method that keeps the knot centered and holds up through drilling and light sparring. Below is the exact sequence our coaches at Trein Club walk through with new families in Oak Forest, Houston, taught in the same order we share with parents during their first trial visit.
What You Need Before You Start: Choosing the Right Kids BJJ Belt Size
Before worrying about technique, make sure the belt actually fits. A properly sized kids BJJ belt should wrap around your child’s waist twice and leave roughly 8 to 12 inches hanging on each side once the knot is finished. Anything longer becomes a tripping hazard; anything shorter won’t hold a secure knot.
- A0 (approx. 98–118 in / 250–300 cm): Small children, ages 4–7, most youth gis size M0–M2.
- A1 (approx. 106–126 in / 270–320 cm): Larger kids and preteens, gi sizes M3–M4.
- A2 (approx. 118 in / 300 cm+): Teens transitioning to adult sizing.
Also confirm the belt has clean, tight stitching, a firm (not floppy) core, and — if your child has already earned promotions — a black bar at one end where stripes are placed. Have your child stand tall, feet shoulder-width apart, gi jacket closed with the left lapel over the right. You’re ready to tie.
Step 1 – Find the Middle of the Belt and Place It Against Your Child’s Stomach
Fold the belt in half to locate the midpoint, then unfold it and hold that center point flat against your child’s belly button, over the gi jacket. The black bar (stripe tab) should end up on the child’s left side once the knot is finished, so orient the belt with the stripe end on the left as you begin.
Step 2 – Wrap Both Ends Around the Waist and Cross Them at the Back
Take both ends and pull them around your child’s waist toward the back. Cross the two ends behind them — one over the other, in whichever order feels natural — and bring them back around to the front. Keep tension even so the belt sits flat and doesn’t ride up under the gi’s armpits.
Step 3 – Bring Both Ends to the Front and Cross the Right End Over the Left
Once both ends are in front and roughly the same length, cross the right end over the left. You should now see two horizontal wraps of belt around your child’s waist, with two loose ends forming an “X” over the belly. If one end is dramatically longer than the other, unwrap and re-center — that’s the number one cause of a lopsided knot.
Step 4 – Tuck the Top End Up and Under All Belt Layers
Take the end that’s now on top (originally the right end) and thread it upward, from underneath, through both layers of the belt wrapped around the waist. Pull it snug. This is where most parents slip up — tucking under only one layer produces a knot that unravels the moment a training partner grabs it.
Step 5 – Tie the Final Knot So Both Ends Are Even and the Belt Stays Secure
You now have two ends pointing in opposite directions. Cross the top end over the bottom end, loop it under, and pull through — the same motion as tying shoes without the bunny ears. Tighten firmly. Check that both ends hang at the same length and the knot sits centered over the belly. A correctly tied belt feels snug without restricting movement, and the knot should look like a neat horizontal band rather than a lump.
The Superlock Method: An Alternative Belt-Tying Technique for Active Kids
If your child rolls hard, sweats a lot, or simply never stops moving through class, the traditional knot may still work itself loose. That’s where the Superlock method comes in — a variation that adds an extra loop of friction and dramatically reduces mid-class re-tying.
Why the Superlock Knot Works Better for Kids During Rolling and Sparring
Grappling puts constant lateral pressure on the belt. Every scramble, hip escape, and guard pass tugs at the knot from a different angle. A standard knot relies on a single crossover to hold, while the Superlock uses two threaded loops that lock against each other — so even when a partner grabs the belt for control (which happens constantly in kids’ classes), it won’t unravel. Parents at Trein Club often ask about this after watching their child stop mid-roll to fix their belt three times in one round. If you’re curious about how kids’ training is structured overall, we break it down in our guide on kids’ BJJ classes.
Step-by-Step: How to Tie the Superlock Style for a Kids Jiu-Jitsu Belt
- Start exactly like the standard tie: center the belt on the belly, wrap around, cross in back, and bring both ends to the front.
- Instead of crossing right over left immediately, take the right end and pass it under both waist layers first, from top to bottom, pulling it down through.
- Now cross the two ends — the one you just threaded goes over the other.
- Thread that same end back up and under the crossover you just made, forming a second interlocked loop.
- Pull both ends firmly outward to lock. The finished knot looks nearly identical to the standard version but has an extra internal wrap that grips itself.
Give it a tug test: grab both hanging ends and pull. A properly tied Superlock will barely budge.
Tips to Help Kids Tie Their Own BJJ Belt Independently
Tying the belt is more than a chore — it’s one of the first rituals of discipline in jiu-jitsu. Learning to do it independently builds ownership over training and small doses of confidence that carry off the mat.
Age-Appropriate Expectations: When Can Kids Start Tying Their Own Belt?
Most children can begin learning the motion around age 5 or 6, but expect parent-assisted tying until roughly age 7 or 8. By 9 or 10, most kids can tie the standard knot cleanly on their own; the Superlock usually clicks around 10 to 12. Younger children benefit from tying the belt with you, hand over hand, rather than being told to figure it out alone. It’s the same principle behind the confidence work jiu-jitsu builds in kids more broadly — a topic we explore in how BJJ helps kids deal with bullying.
Practice Drills and Memory Tricks to Make Belt Tying Easier for Children
- The chair drill: Have your child practice tying the belt around a dining chair back at home. It’s about the same diameter as a small waist and removes the frustration of doing it on themselves.
- Say the steps out loud: “Middle, wrap, cross, tuck-up-under, tie.” Turning the sequence into a five-word chant helps kids memorize it faster than watching a demo.
- Color-mark the middle: A small dot of fabric marker at the belt’s midpoint gives younger kids a visual target so step one becomes foolproof.
- Practice before class, not during: Two minutes at home three times a week beats scrambling on the mat.
Understanding the Kids BJJ Belt System and What Each Color Means
Unlike the adult belt system, which moves from white to blue, purple, brown, and black, the youth belt system uses a broader color palette designed specifically for children under 16. Each color represents accumulated mat time, skill development, and — just as importantly — character growth.
Youth BJJ Belt Order: White, Yellow, Orange, Green and Beyond (Under 16)
According to the IBJJF youth ranking system, kids progress through the following order:
- White — the starting point for every practitioner.
- Gray (with sub-ranks: gray-white, solid gray, gray-black) — typically ages 4–15.
- Yellow (yellow-white, solid yellow, yellow-black) — from age 7.
- Orange (orange-white, solid orange, orange-black) — from age 10.
- Green (green-white, solid green, green-black) — from age 13.
Once a student turns 16, they graduate into the adult system and receive their first adult belt — most commonly blue, though placement depends on skill and coach evaluation. Curious about what happens after that transition? See our breakdown of what comes after white belt in jiu-jitsu.
How Stripes Work on Kids Jiu-Jitsu Belts and Where They Go When Tying
Stripes are placed on the black bar at the end of the belt and represent progress within a given color rank. Most academies award up to four stripes per belt before promoting to the next color or sub-rank. When tying, the striped end should hang on your child’s left side — a tradition that also makes the stripes clearly visible during class lineups and promotions.
Common Mistakes Parents Make When Tying a Kids Jiu-Jitsu Belt
Even after watching a demo, most parents make the same handful of mistakes in the first few weeks. Here’s how to spot and fix them.
Belt Too Loose or Too Tight: How to Find the Right Fit for Your Child
A belt that’s too loose slides down during warm-ups, drags on the mat, and comes undone within minutes. A belt that’s too tight restricts breathing and hip movement — critical for a sport built on hip escapes and bridges. The correct tension: two flat fingers should slide between the belt and your child’s gi at the belly, but not your whole hand. If the belt visibly moves when your child jumps, it’s too loose.
Uneven Ends and Twisted Wraps: How to Spot and Fix Them Quickly
Uneven ends almost always trace back to an off-center start. If one end is more than two inches longer than the other after tying, unwrap and adjust the midpoint at step one. Twisted wraps — where the belt rotates 180 degrees as it goes around the back — are a cosmetic issue but usually mean one hand is pulling harder than the other. Move both hands at equal speed, and run your fingers along the back of the belt after step two to smooth any twists before crossing in front.
Video Walkthrough: Watch a Coach Tie a Kids BJJ Belt in Under 60 Seconds
Reading through the steps helps, but watching a coach demonstrate the motion in real time is what makes it click for most parents. During any trial class at Trein Club, one of our kids coaches will walk you through both the standard tie and the Superlock method, hands-on, before your child steps onto the mat. Families who visit us at 1102 Pinemont Dr in Oak Forest often say the belt-tying lesson is the moment their kid actually feels like a jiu-jitsu student — the uniform, the belt, the ritual. Three trial classes are available before any commitment, covering everything from tying the belt to the first techniques your child will learn.
Frequently Asked Questions
FAQ: How do you tie a jiu-jitsu belt for a small child who keeps fidgeting?
Have them stand facing away from you, holding onto a wall or the back of a chair for balance. This positions their hips at your working height, keeps their hands occupied, and removes the mirror as a distraction. Talking them through each step out loud (“wrap, cross, tuck”) also helps — kids fidget less when they feel involved in the process rather than being handled like a mannequin.
FAQ: What is the correct length a kids BJJ belt should hang after tying the knot?
Roughly 8 to 12 inches on each side, hanging evenly. Longer than 12 inches becomes a trip hazard during drills; shorter than 6 inches means the belt is too small and the knot won’t hold reliably.
FAQ: Is there a difference between tying a kids jiu-jitsu belt and an adult BJJ belt?
The technique is identical, but kids’ belts are narrower, shorter, and have less stiff cores. That makes them easier to tie but also easier to loosen, which is exactly why the Superlock variation is popular in youth classes.
FAQ: How do I keep my kid’s belt from coming undone during class?
Use the Superlock method, tighten firmly before class, and check that step 4 (the tuck) goes under both waist layers, not just one. If the belt still loosens, it’s likely oversized — try dropping down one belt size.
FAQ: At what age should a child be able to tie their own jiu-jitsu belt?
Most children can independently tie a standard knot by age 8 or 9. Before that, expect parent assistance. Independent belt-tying is often one of the small milestones coaches celebrate in class because it signals a child taking ownership of their training.
FAQ: What size belt do I need for my child’s jiu-jitsu gi?
Match the belt size to the gi size roughly as follows: gi M0–M2 pairs with belt A0, gi M3–M4 with A1, and gi M5+ with A2. When in doubt, size down slightly — a belt that’s slightly short still ties cleanly, while one that’s too long drags on the mat.
FAQ: Does it matter which end of the belt goes on top when tying the knot?
Functionally, no — the knot works either way. Traditionally, the striped end (black bar) should finish hanging on the child’s left side after tying. It’s a small detail, but it’s part of the discipline and respect that jiu-jitsu culture cultivates from day one.